A little paint goes a long way!

Monday, December 13, 2010

Windows are the thing!

I think I've mentioned before that I usually crash and burn on anything window-treatment related. I can never make up my mind what I want, and what I do decide would look half-way decent ends up being a rather nice down payment on a car--so those ideas usually go right. out. the. window. so-to-speak ;-0)

I knew the window treatments I chose for the bedroom would either make or break this little project. My fear of course was that it would also break the bank, given the fact that our window takes up almost the entire wall. Seriously! It's a big honkin window.

Here's what I started with...


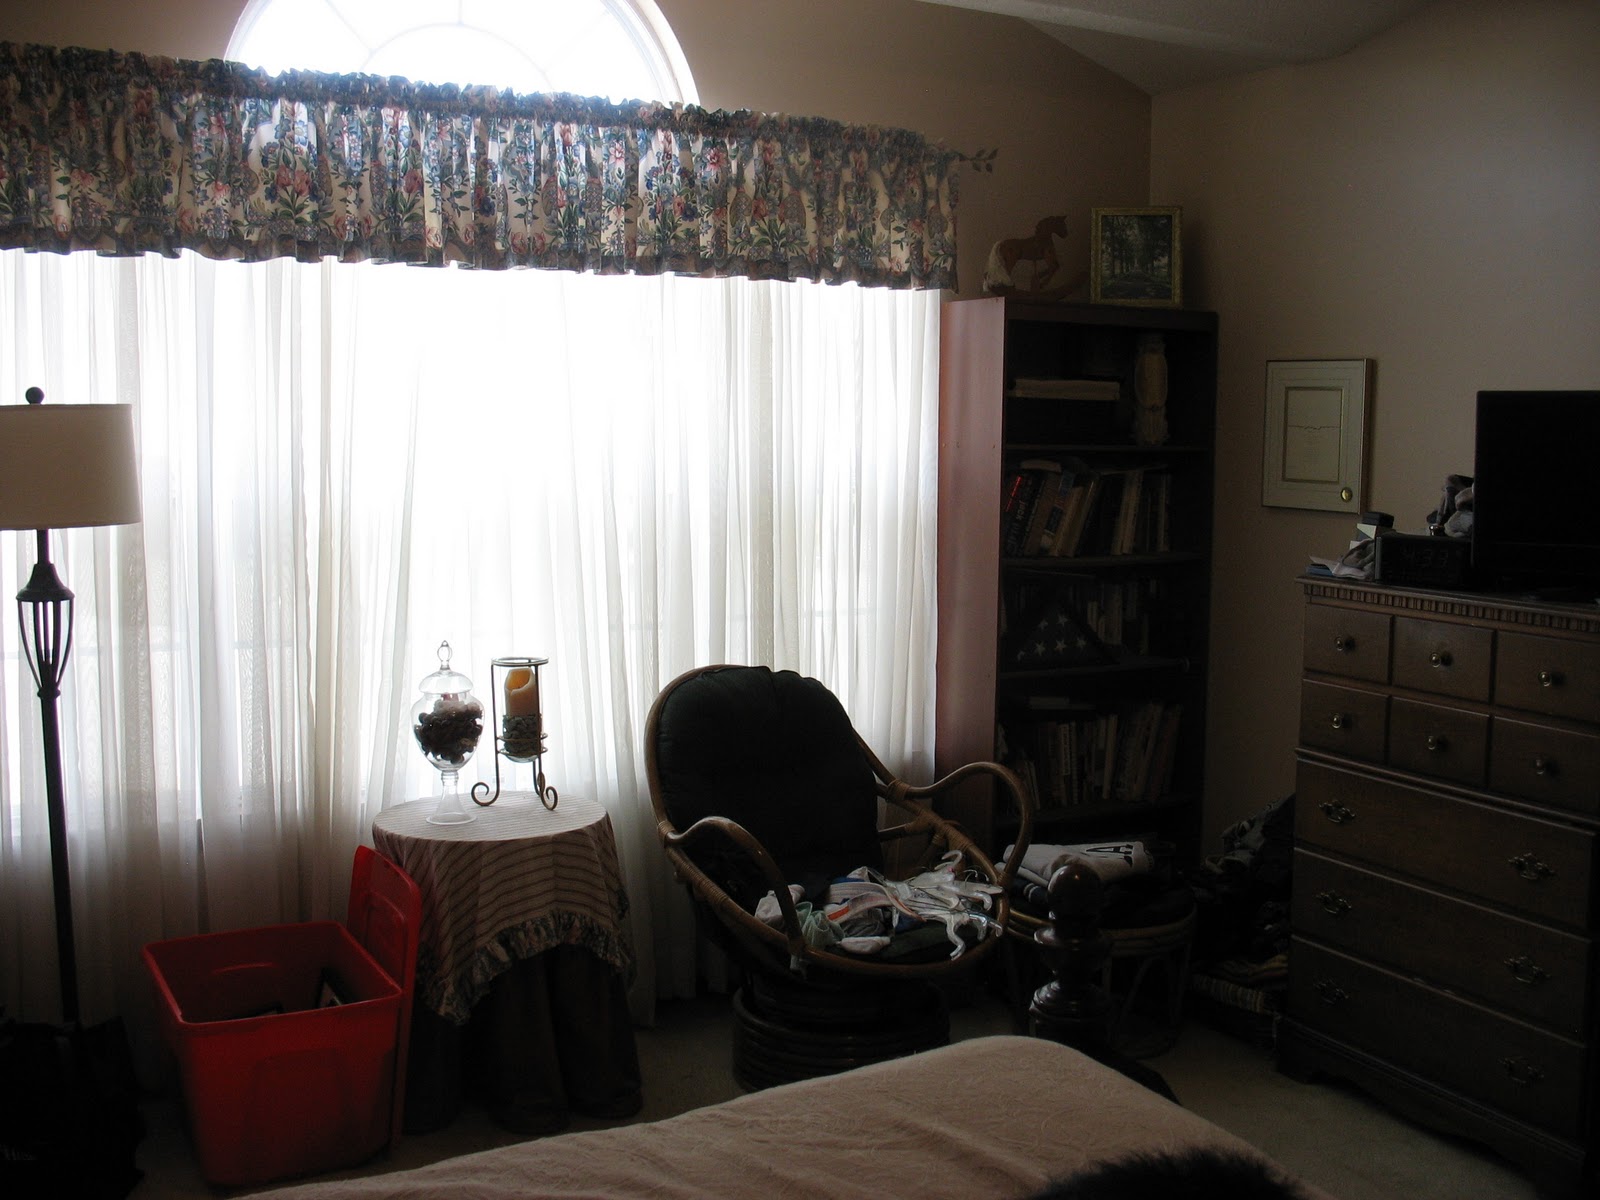
Yeah, did I mention that they are also IMPOSSIBLE to photograph because there's so much light coming in? You get the idea. When we moved in, they had tabbed curtain panels and no blinds, so every night, we had to close those panels and they weren't exactly easy to close. And, because of all the light, they were completely faded. It doesn't take long to fade fabric in this room. We also had nice pink stains all along the carpet from when they would forget to close the windows during the rain. The stains are still there and will be until the kids graduate from college and we can afford new carpet!

I never could figure out how to do blinds in this room because the middle window (the wall is made up of 3 separate windows--one small on each end and a large one in the middle) didn't have anything above it to anchor blinds to. Now, I'll admit that my brain power is challenged from time to time, and I more than likely started to think about different options to solve that seemingly impossible dilemma, but I'm sure was interrupted by a fight slight disagreement about who had which Lego first. I mean. Really. If you couldn't tell already, Legos are a hot commodity around here. Just not enough to go around. Yeah. Right.

I've been loving the look of bamboo shades lately and I'd like to transition all our rooms to them. I just think they really warm up a space, and they aren't as much of a nightmare chore to clean. I'm sure they get plenty dusty too, but since they're brown, who could tell? It's when your blinds look brown but they're supposed to be white that it bothers people. Am I right?

On my dream shopping day when I splurged $200 on everything window treatment and accessory related for this room, I found the perfect panels for the space--they matched the BGG (my code for that heavenly blue green gray color) in my new bedding and they were only $10 a piece at the budget decorator's palace--Big Lots! They also had these amazingly BIG and BEAUTIFUL copper grommets so no additional hardware to buy! BONUS!!

Bamboo shades are pretty cheap as far as shades go, and I didn't splurge on the ultra private ones because I was planning to line them myself (not as hard as it sounds) so that was about $70 + $40 for 4 curtain panels = One cheap a$$ window treatment for my new MomCave!! (Sorry for the swearing...there just isn't a better way to say that peeps!)

So, here's the before again...

Farewell Aunt Phyllis's valance and my nasty old grandma-looking sheers.

And here's how it turned out...

Can I get an AMEN!! I mean, this is insane it's so good!

We (again using "we" loosely) put a 2x4 above that middle window braced between the two smaller windows and voila...I finally figured out the maddening predicament for using blinds in this room! (For those of you thinking, well, duh! I know. I get in my own way sometimes.)

I know. You're really missing the 20-year-old laundry holder  rattan chair with matching ottoman aren't you?? Yeah. me too. NOT! A BIG. HUGE. GOTTA LOVE HER. THANK YOU to my sister-in-law Trish for her donation of two leather barrel chairs for this project. I gladly lifted those off her hands when she was looking to purge some furniture from her old house. SCORE!!

I know, the GORG new (looking) black chest of drawers is taunting you, making you want to scream "Where'd those come from!" All in good time peeps. Gotta get some snow angels from outside and get back to work!

Ceiling fans...love 'em or hate 'em??

Sorry it's taken me so long to post an update...I'll spare you the details but as soon as I finished the big room redo--it was time for Thanksgiving and another massive project...my annual Deck the Halls O' Kurtz! You did read that correctly, the room is officially D-O-N-E!! And if I do say so myself, this room should have its own show! I'm going to get her an agent. Really. Any minute now, I'm sure Oprah will be calling. Or Candace from Devine Design. Or <<gasp>>, maybe my gay boyfriend Nate Berkus will phone me up to say he can't live without me to pal around with One. More. Second. (((sigh)))

I'd love to show Nate my bedroom in a purely platonic, gay boyfriend kinda way! I think he'd be so proud. Of course I'd have to blindfold him as he maneuvers through the rest of the house and that might just be enough to TOTALLY FREAK HIM OUT so maybe I'll skip the blindfolding and just take a few pictures, ummmmkay? That's probably for the best.

Well, as tempting as it is to just hop right to it and show you all the fabulous pictures and do a little "Move that Bus Mouse" game with ya, I need to explain the complexities and purely blissful details of each little makeover success (and fail) in the room so that you truly appreciate my neurosis thought process and attention to detail.

This room redo is a collection of little transformations. My goal was to reuse and repurpose as much as I already had because my budget was teeny tiny, nonexistent, had to sell things to get the money kind of budget.

If you've followed this blog at all, you know that I HATE BRASS. And I'm quickly developing a dislike for wood trim. Well, cheap wood trim. Some wood trim is kinda nice, but I'm missing my big thick painted wood trim in our old house. It just gives the perception of clean--with extra emphasis on "perception" especially in this house of little messy men!

I had several points of interest in my room that just had. to. go. For starters...the dreaded ceiling fan! Now, I'm not all HGTV-gotta-get-rid-of-the-ceiling-fan-in-every-room-or-I-might-hurl kinda designer. I like my ceiling fan especially when our budget planning doesn't accommodate air conditioning until say JULY! That's when my ceiling fan and I are buds. I just hated its color. I know, I know, don't judge a fan by its color--it was functioning and did a nice job without much noise. But when I'm lying in bed staring at my ceiling (yeah, like I have much time for that--but let's just imagine that I did this quite often ummkay?) I want to rip it down and blame the kids. Really. That bad.

I've also told you before that I'm all kinds of patient right? Yeah, we'll go with that. Anyhoo, I broke the number one rule of blogging and forgot to take a before pic of the lovely little whitish brass gem on my ceiling so these will have to do...


Now, in full disclosure...I'm not a real Rock Star, I didn't take this down myself. That's what my handyman Mike is for! Every girl needs a hot assistant right? ;-0) I don't do electric. Or power tools. Yet. Get me inpatient enough and you just never know!

So we took this down and dismantled the whole thing piece by piece. (And by "we" of course I mean Mike with me offering a tremendous amount of encouragement.)

Using my fav BFF Rustoleum ORB, I sprayed every honkin' thing with light coats being careful not to super saturate the inner workings of the fan. Then I used just plain old brown spray paint for the blades. At first I wasn't sure--Mike thought it looked a little like car primer! But when we got it together and put it up...

Voila!!!!


Ahhhhmazing!!!!

This is just the first installment of some other awesome transformations in the room...I hope to get to more posts this week!

Gotta run...I think Nate is calling. Byyyeeee!